Official Manual / First Connection
Shadowrocket Guide
This guide uses the iPhone / iPad interface as an example. Starting with a server or subscription you already have, follow the steps to import it, choose a routing mode, connect, and verify access. If you have already imported it, go directly to Global Routing.
Add a server or import Subscribe
First, identify the details you have. If you have the protocol, hostname, port, and related credentials, add the server manually. If you already have a subscription URL from your provider, choose Subscribe. A subscription URL and a server hostname serve different purposes: do not enter a full subscription link in Host or treat a single server address as a subscription. Choose either method to get started; there is no need to import the same entry twice.
Enter details manually with Add Server
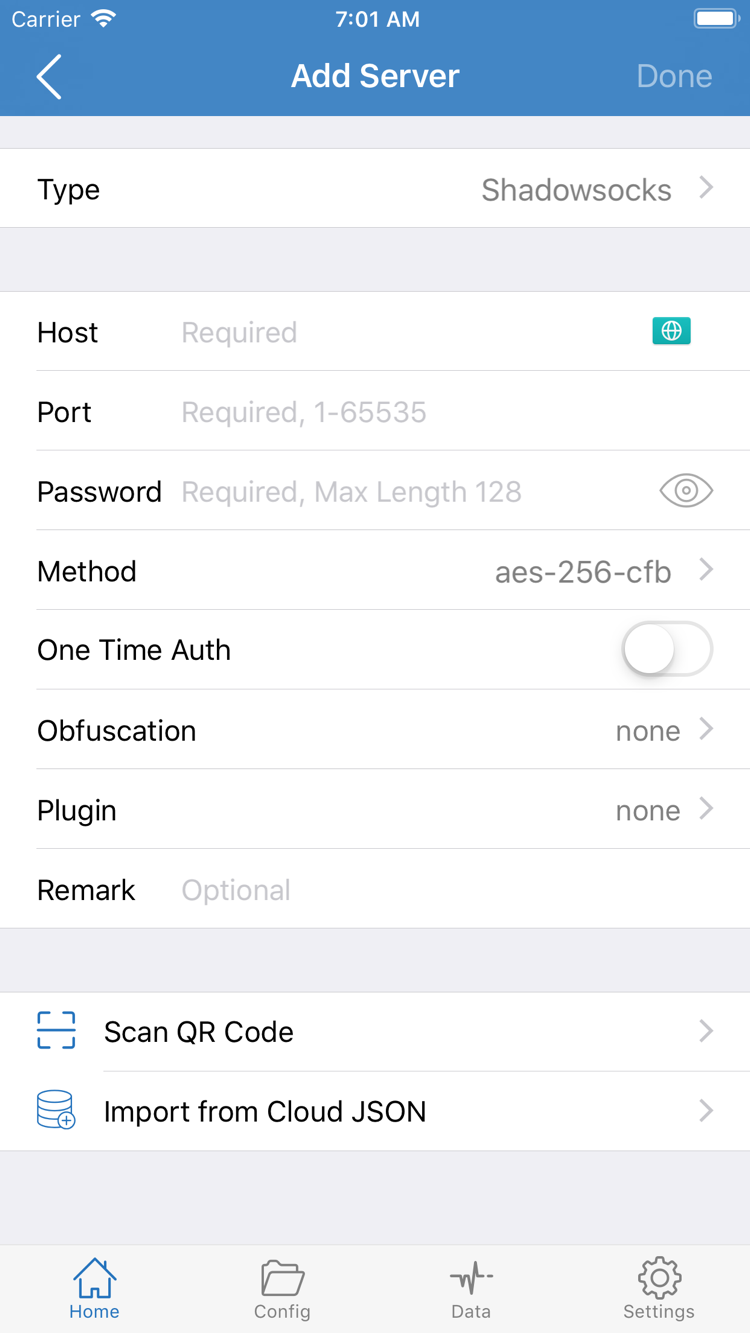
Open Home and find Add Server in the SERVER section. In the form, tap Type and choose the protocol that matches the details you have. The protocol determines which fields appear. For example, with Shadowsocks, enter the server hostname or IP in Host, the port number in Port, and the corresponding password in Password. Set Method to match the server configuration. Do not assume the fields shown in an example apply to every protocol; after changing Type, fill in the fields displayed and use the details provided by your service provider.
Before saving, check the details carefully. Make sure Host does not include a URL path, the port has been copied correctly, and there are no extra spaces at the beginning or end of the password. If you have a QR code for sharing a single server, use Scan QR Code in Add Server. After scanning, check the detected Type and key fields before saving. A successful scan only means the contents were recognized; it does not confirm that the server is usable.
Import an existing link with Subscribe
From Home, open Add Server, select Subscribe under Type, and paste the complete link provided by your service provider into the subscription URL field. Keep the query parameters and do not truncate the end of the link. After saving, return to Home and find the corresponding subscription group. Confirm that available entries appear after updating. If you see a group name but no servers, troubleshoot subscription retrieval or parsing before changing the routing mode. Once entries appear, select the server you intend to use and note its name so you can check the same entry during testing.
Choose Global Routing
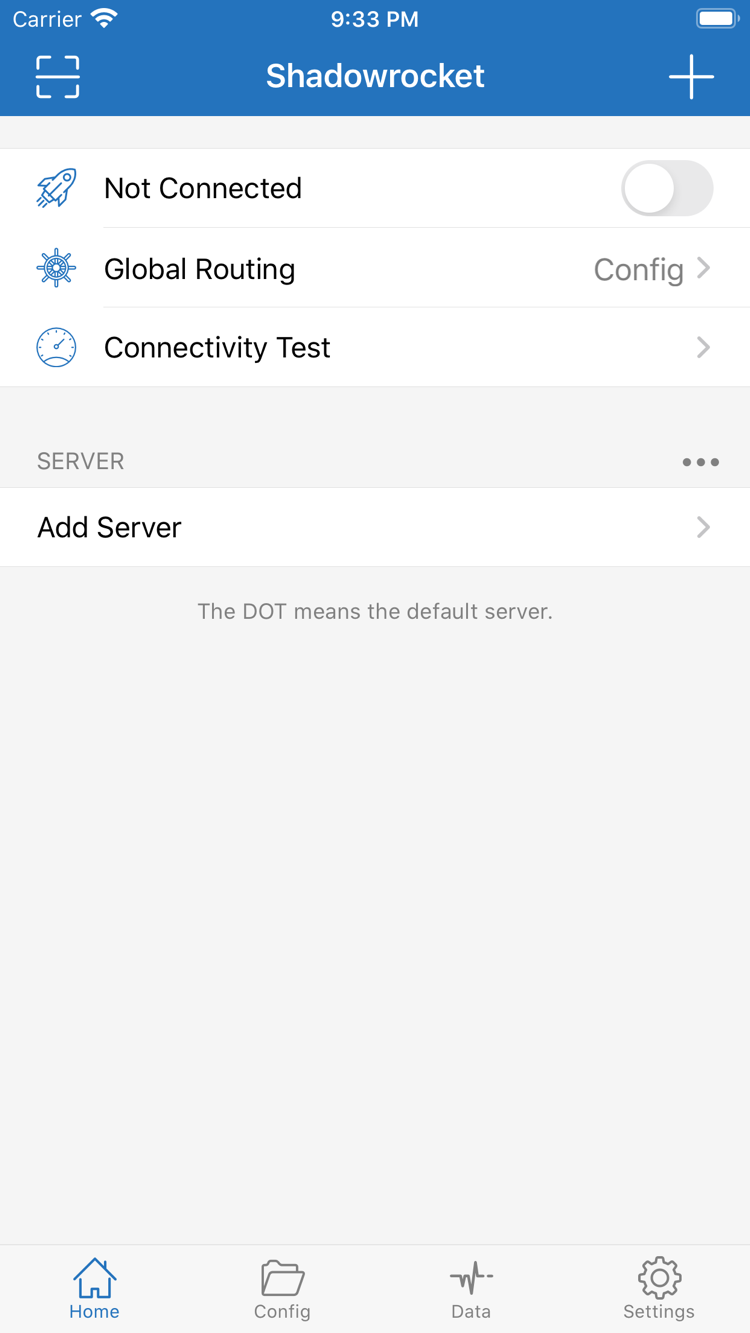
Return to Home, tap Global Routing, and check the current routing mode. Selecting a server chooses the available proxy exit; selecting a routing mode determines how requests are handled. These are separate choices: selecting a server in the list does not mean every request will go through it.
- Configuration (Config): match requests against the rules in the active configuration file. Use this mode to route traffic by destination; requests may use PROXY or DIRECT, depending on the first matching rule.
- Proxy: do not select policies rule by rule from the configuration file. Use this temporarily for comparison if you want to check whether the selected server can handle proxy requests.
- Direct: requests are not forwarded through the selected server. Use this to compare whether the same destination is accessible directly on the current network; it does not turn off the Home connection switch.
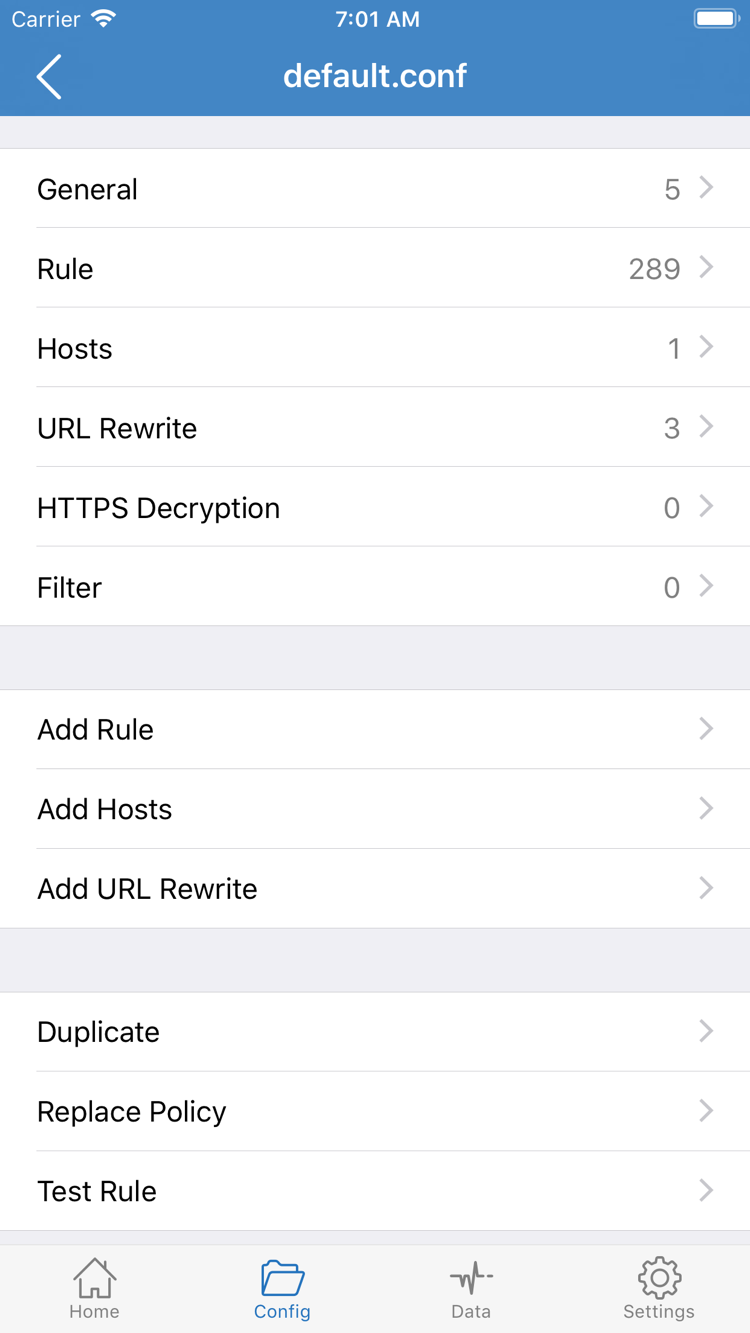
After selecting Configuration (Config), open Config to check the active configuration file, then find Rule in the edit screen. Do not confuse that screen with Global Routing on Home: the former defines matching conditions and policies, while the latter determines whether to use those rules. Rules are checked in order, and processing stops at the first match. The following snippet illustrates rule order only; you do not need to replace your existing configuration:
[Rule]
DOMAIN,docs.example.com,DIRECT
DOMAIN-SUFFIX,example.com,PROXY
FINAL,DIRECT
In this example, docs.example.com matches the first rule and uses DIRECT; another subdomain, such as www.example.com, matches the second rule. If you swap the rules, the broader suffix rule will match docs.example.com first. Requests that match none of the earlier rules fall through to FINAL. For a first connection, keep the existing configuration and leave General, Hosts, and URL Rewrite unchanged. To modify matching conditions, make a backup first, then refer to the Rules Manual.
Turn on the Home connection switch
After choosing a routing mode, return to Home and confirm that the server selected under SERVER is the one you intend to use. If your subscription contains entries with similar names, open the details to check rather than guessing from the name alone. Then turn on the switch beside Not Connected at the top of Home. On the first run, iOS or iPadOS may prompt you to add a VPN configuration. Confirm that the prompt was triggered by your action in Shadowrocket, then allow it and complete the system verification.
After handling the system prompt, return to Home, wait for the status to stabilize, and confirm that the switch remains on. If it immediately switches back off, do not keep tapping or change servers at the same time. First check whether you completed the system prompt, whether another VPN connection is active on the device, or whether a device management policy restricts connections. For a managed device, ask the administrator about restrictions; do not remove the management profile just to test.
A switch that stays on indicates that a local connection has been established. It does not confirm that the remote server, destination site, or every routing rule is working correctly. For the first test, keep the current network, selected server, and routing mode unchanged. This makes it easier to determine whether a later access failure occurred during the local connection stage or after a request entered the connection.
Verify with Connectivity Test and real-world access
Return to Home and tap Connectivity Test to view the result for the selected server. If results appear for multiple entries, find the row matching the server you selected. A successful test only means that the entry received a response under the current test conditions; it does not replace testing access in a browser or destination app. A failed test also needs to be assessed in light of the test method and does not automatically mean all access will fail.
Next, open a page that you are allowed to access and whose usual result is clear. Reload it manually to avoid relying on the browser cache; if needed, check again in a new page. With Configuration (Config), choose one destination expected to use DIRECT and another expected to use PROXY, and note each destination's actual hostname. Do not rely only on the site name shown on the page: after a redirect, the page may be on a different hostname, and its images, scripts, or APIs may also come from other domains.
If request logs are available, find the request for this visit by time and hostname, then compare the policy shown in the log with the rules in Config. If there are no usable logs, return to Rule and check the rules manually in their original order. First check whether the destination matches an earlier exact or suffix rule, then whether it falls through to FINAL. A page loading successfully by itself does not prove that it used the expected policy.
For comparison, access the same destination on the same network and change only Global Routing for each test. Restore the original mode afterward. If access works with Proxy but fails with Configuration (Config), check the rules and active configuration file first. If both fail, continue by checking the server details and current network. Do not compare results from different sites, and do not leave the mode changed just to verify a connection once.
Troubleshoot common failures in Settings
First identify where the failure occurs. No selectable entries in the list indicates an import issue; a switch that will not stay on points to the system connection; if the switch is stable but a test or visit fails, distinguish between the exit, test conditions, and rules. Troubleshooting in these three stages helps avoid disrupting the configuration currently in use.
No entries after updating a subscription
Confirm that Type is Subscribe, then copy the complete original URL again from your service provider's records. If the URL includes query parameters, keep everything after the question mark. If the URL is correct but the group is still empty, ask your service provider whether the link is still valid and whether its response format works with Shadowrocket. Do not paste the complete URL into a public parsing tool or delete a group that still works.
Test times out after connecting, or only some destinations fail
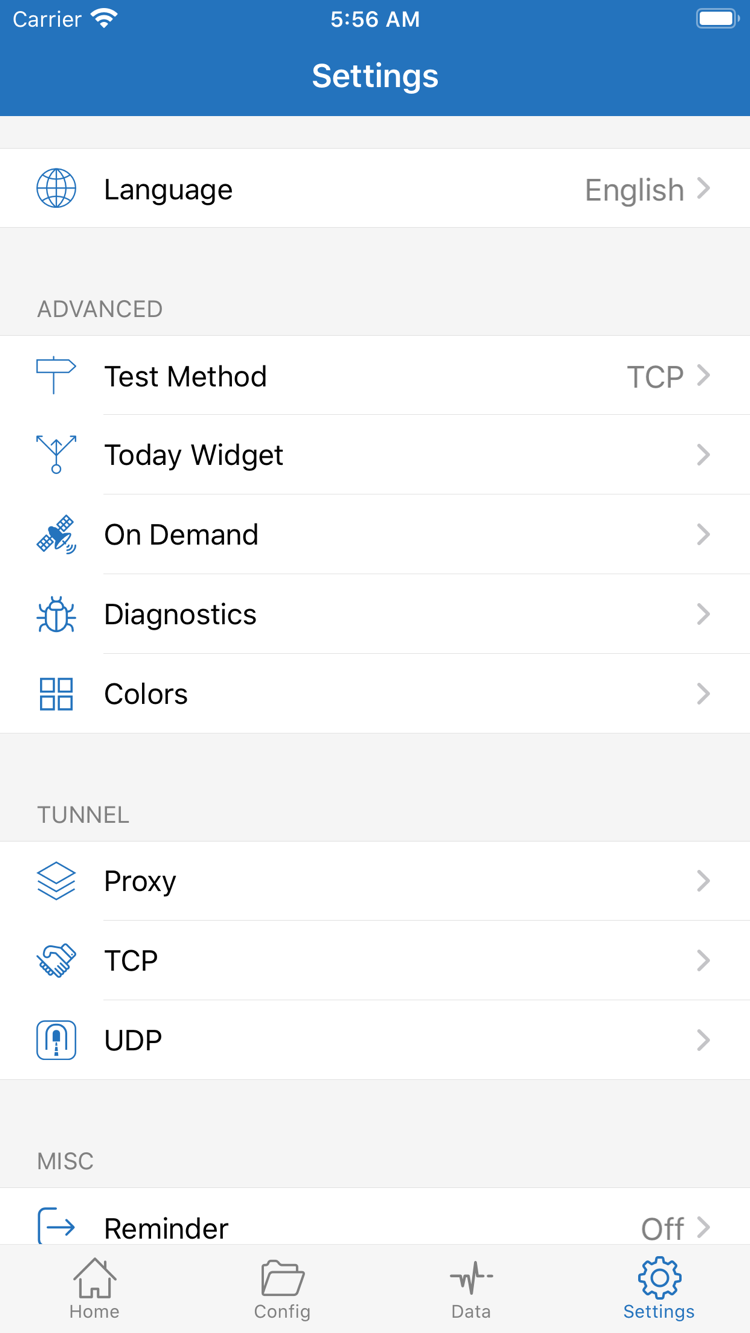
Open Settings and check Test Method to make sure both comparison tests use the same method. If the current server keeps timing out, first check whether the device itself can access the internet, then compare with a known working network. Return to the relevant Add Server fields and check Type, Host, Port, and any protocol-specific parameters. If only some destinations fail, repeat the mode comparison for the same destination using the verification steps, then check whether its domain matches REJECT or falls under a policy different from the one expected.
Connection status changes after switching networks
Check whether On Demand is enabled in Settings. When enabled, a network change may trigger a reconnection or disconnection. Note the current conditions before testing so that On Demand behavior is not mistaken for a server failure. If the cause is still unclear, open Diagnostics and record the time of the failure, the connected network, the mode, and any error shown in the interface. Before sharing diagnostic information, conceal server credentials, subscription URLs, and access logs that should not be public. After changing one setting, return to Home and test again; restore temporary changes once the issue is resolved.